Want to get a better pulse on what’s working and what’s not for your business? Google Analytics is a great place to start.
With the right set-up (which we’ll show you how to do, step-by-step), you can find out key information like where your traffic is coming from, how visitors are behaving, how many are becoming customers, and much more.
We’re going to focus on Google Analytics 4 (GA4) as opposed to Universal Analytics, since the latter is being sunsetted by Google in 2023.
This guide is going to show you
- How to create your Google Analytics 4 account & Data Stream
- How to add your GA4 tag to your website and set up conversion tracking
- How to test and validate that it’s working
Before we dive in, here are some need-to-know definitions:
Google Analytics: a wildly popular analytics tool that lets you collect and understand key metrics for your website or app, like how many visits you get, what people are doing on your site, where they’re coming from, and more.
Conversion Tracking: Generally speaking, conversion tracking means understanding how many users are completing a desired action on your site or app that you deem important, like making a purchase. Conversion events can be set up within Google Analytics that will allow you to measure this, and in GA4, some of the work is done for you already (more on this below).
Note for LaunchPass Users: visit our full GA4 integration guide for important information on setting up GA4 for your signup pages.
Let’s get started.
Step 1: Start Measuring
Login to Google Analytics
- Follow the link here and login with the Google account you would like to use for your Google Analytics. Once logged in, you should get to a page that looks like the one below. If you do not yet have a dedicated Google account for your group/business, you can create one here.

Step 2: Account Setup
Creating your GA account
- Enter the account name that you would like. It could be your website’s name, your company name, or for LaunchPass users — your group name.
- Set the data sharing settings you want. We recommend keeping the “Technical Support” option checked on.

Click on “Next”.
Property Details
- Enter your property name. Like the account name you selected, it can also be your website, company, or group name.
- Set your time zone.
- Set your currency.
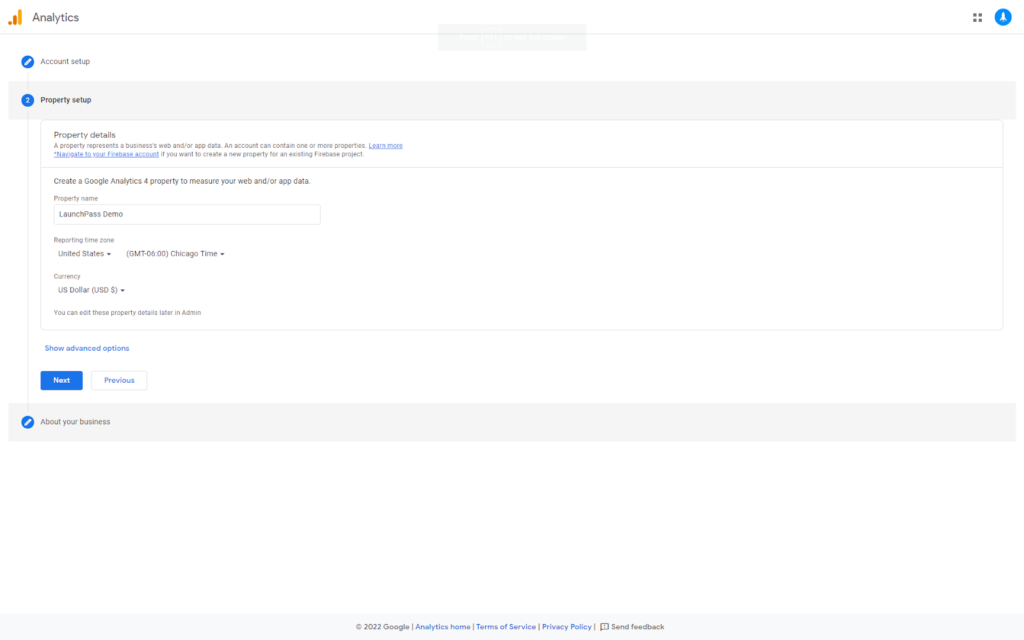
Click “Next”.
Business Details
- Choose the industry category that best describes your business.
- Select your business size and how you intend to use Google Analytics.
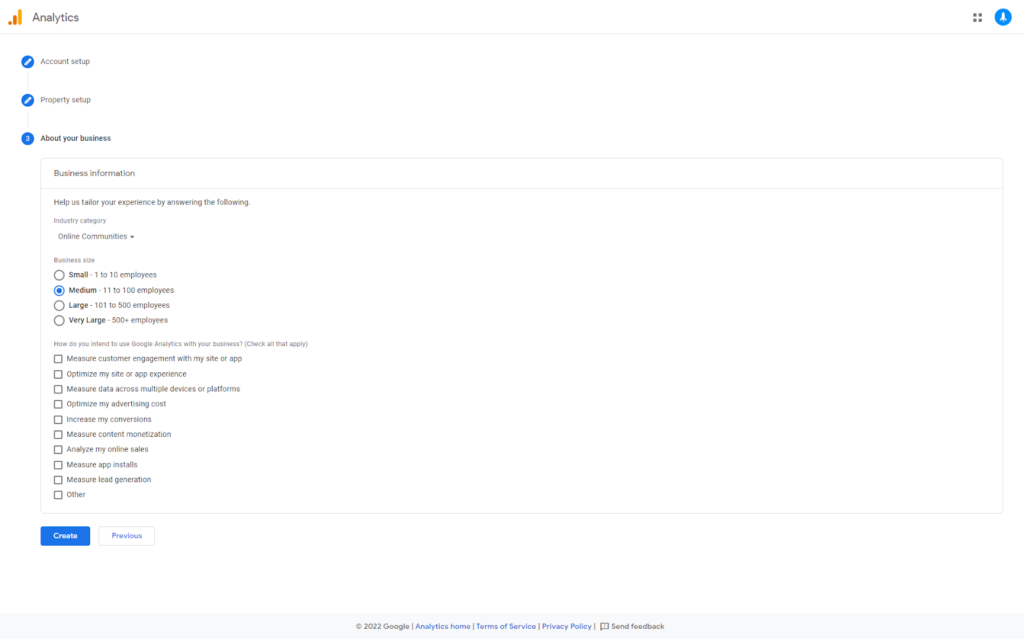
Click on “Create”. A few more steps and we’re almost there!
Step 3: Set up your Data Stream
Choosing a Platform
Google Analytics 4 lets you choose what platform you want to track data for. For our purposes, we’re going to focus on Web, though you can also create data streams for Android and iOS apps.
- Click on “Web” as your choice for setting up a data stream.

Creating a Web Data Stream
- In the “Website URL” field, add your website page URL. (LaunchPass users: please refer to our full GA4 integration guide for the complete setup required here.)
- For the “Stream Name” field, we recommend naming this something easily distinguishable, particularly if you will be setting up multiple streams.
- We recommend leaving the “Enhanced Measurement” checked on.
Let’s click on “Create Stream”.
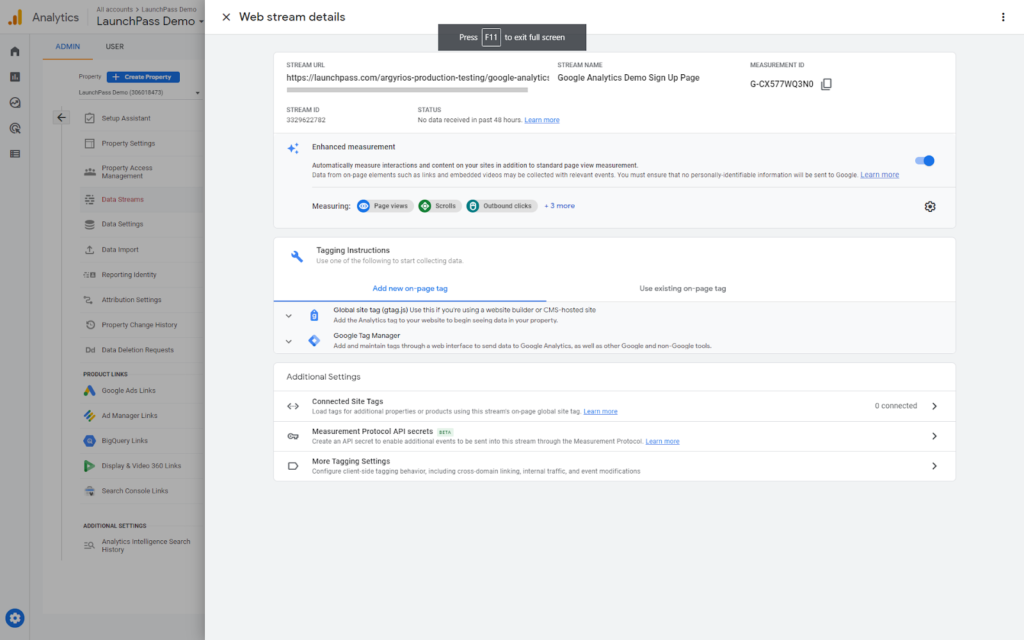
Web Stream Details
- You should now see a detailed overview of your very first web stream, which will look like the below image. Congratulations!
Step 4: Adding GA4 To Your Website (+ conversion tracking)
While there are a few options for tagging, we’re going to focus on adding a new Global site tag to your site.
Viewing Your Gtag
- Under “Tagging Instructions” > “Add new on-page tag”, expand on “Global site tag (gtag.js)” to view the code you will need to add to your website.
- Copy the code to your clipboard.
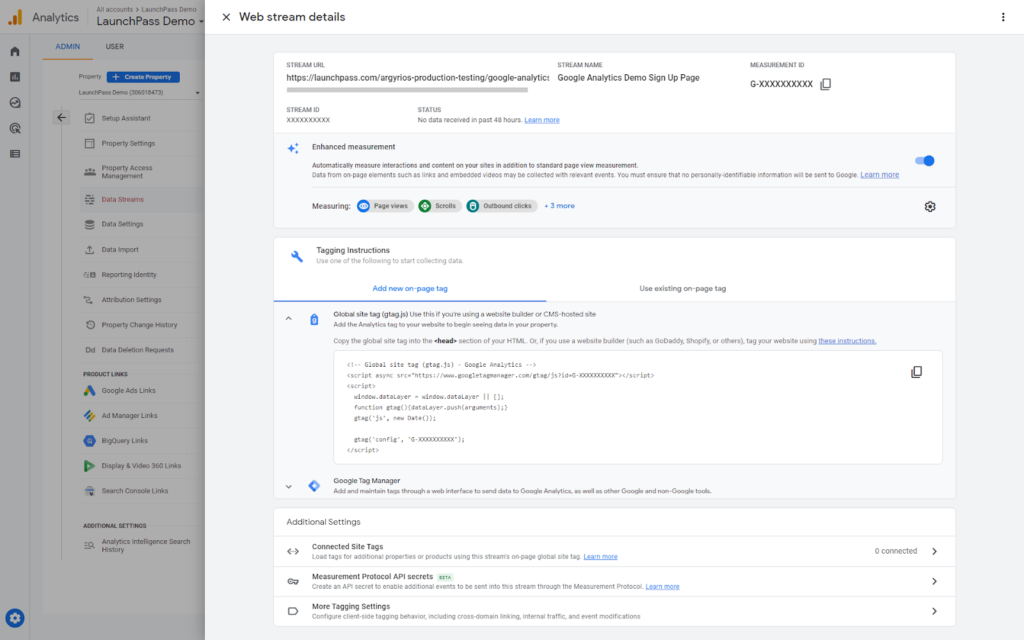
Add Gtag to your site
- Add your site tag directly to your web pages: Paste the tag directly after the <head> on all pages of your website on which you want to track data.
- If you are using a CMS like WordPress or Wix, there are simple ways to add the tag without adding it page-by-page. You can find specific instructions by platform here.
Track Conversions
GA4, by default, tracks a number of events that you can set as conversions.
- In GA4, navigate to “Configure” in the left sidebar.
- Select “Existing Events”. For any event that you would like to register as a conversion, you can toggle it on under the “Mark as conversion” tab.
- Note that by default, “Purchase” is an event that is automatically set as a conversion.
- To verify which events are conversion events, select “Conversions” in the left sidebar.

Step 5: Test & Validate
You should now be set up and collecting data! However, it’s a good idea to test things out to make sure everything is working as it should be.
The simple way to do this is to look at the Realtime report:
- Visit your website from your browser in a separate window or tab from your Google Analytics 4 property
- Head back to GA and go to the “Reports” area towards the top left sidebar
- Click on the “Realtime” tab
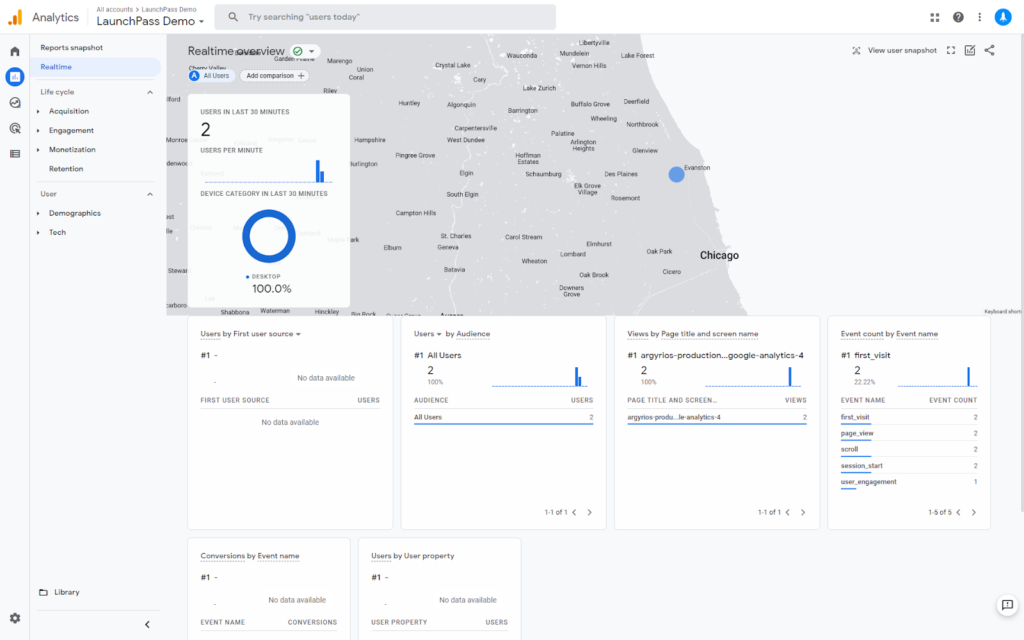
You should now see that a user (you) is on your site and your GA4 property is collecting data!
You can validate conversion tracking is working by completing the corresponding action on your website, for example, making a purchase. You will be able to see if these are being collected within the “Realtime” tab, in the “Conversions by Event name” section.
You’re all set! Hopefully you’ve found our guide to setting up Google Analytics 4 helpful. If you want to see how GA4 and LaunchPass can be used together to help build and grow a profitable paid chat community, check out this guide.
If you’re not yet a LaunchPass user and want to try it out, you can start your free trial here!
